This applies to X-Arcade products with the newest Tri-Mode PCBs in them only.
You can check if you have a Tri-Mode PCB by switching to mode 4 which will make the X-Arcade act like a gamepad instead of a keyboard.
The new Tri-Mode model X-Arcades and PCBs can be firmware upgraded. As new features come out we'll offer the newest version for download here.
FIRMWARE UPDATE INSTRUCTIONS
NOTE: Do not unplug the X-Arcade from the USB while the firmware is being updated! You must either update the firmware or Click Cancel to exit firmware update mode.
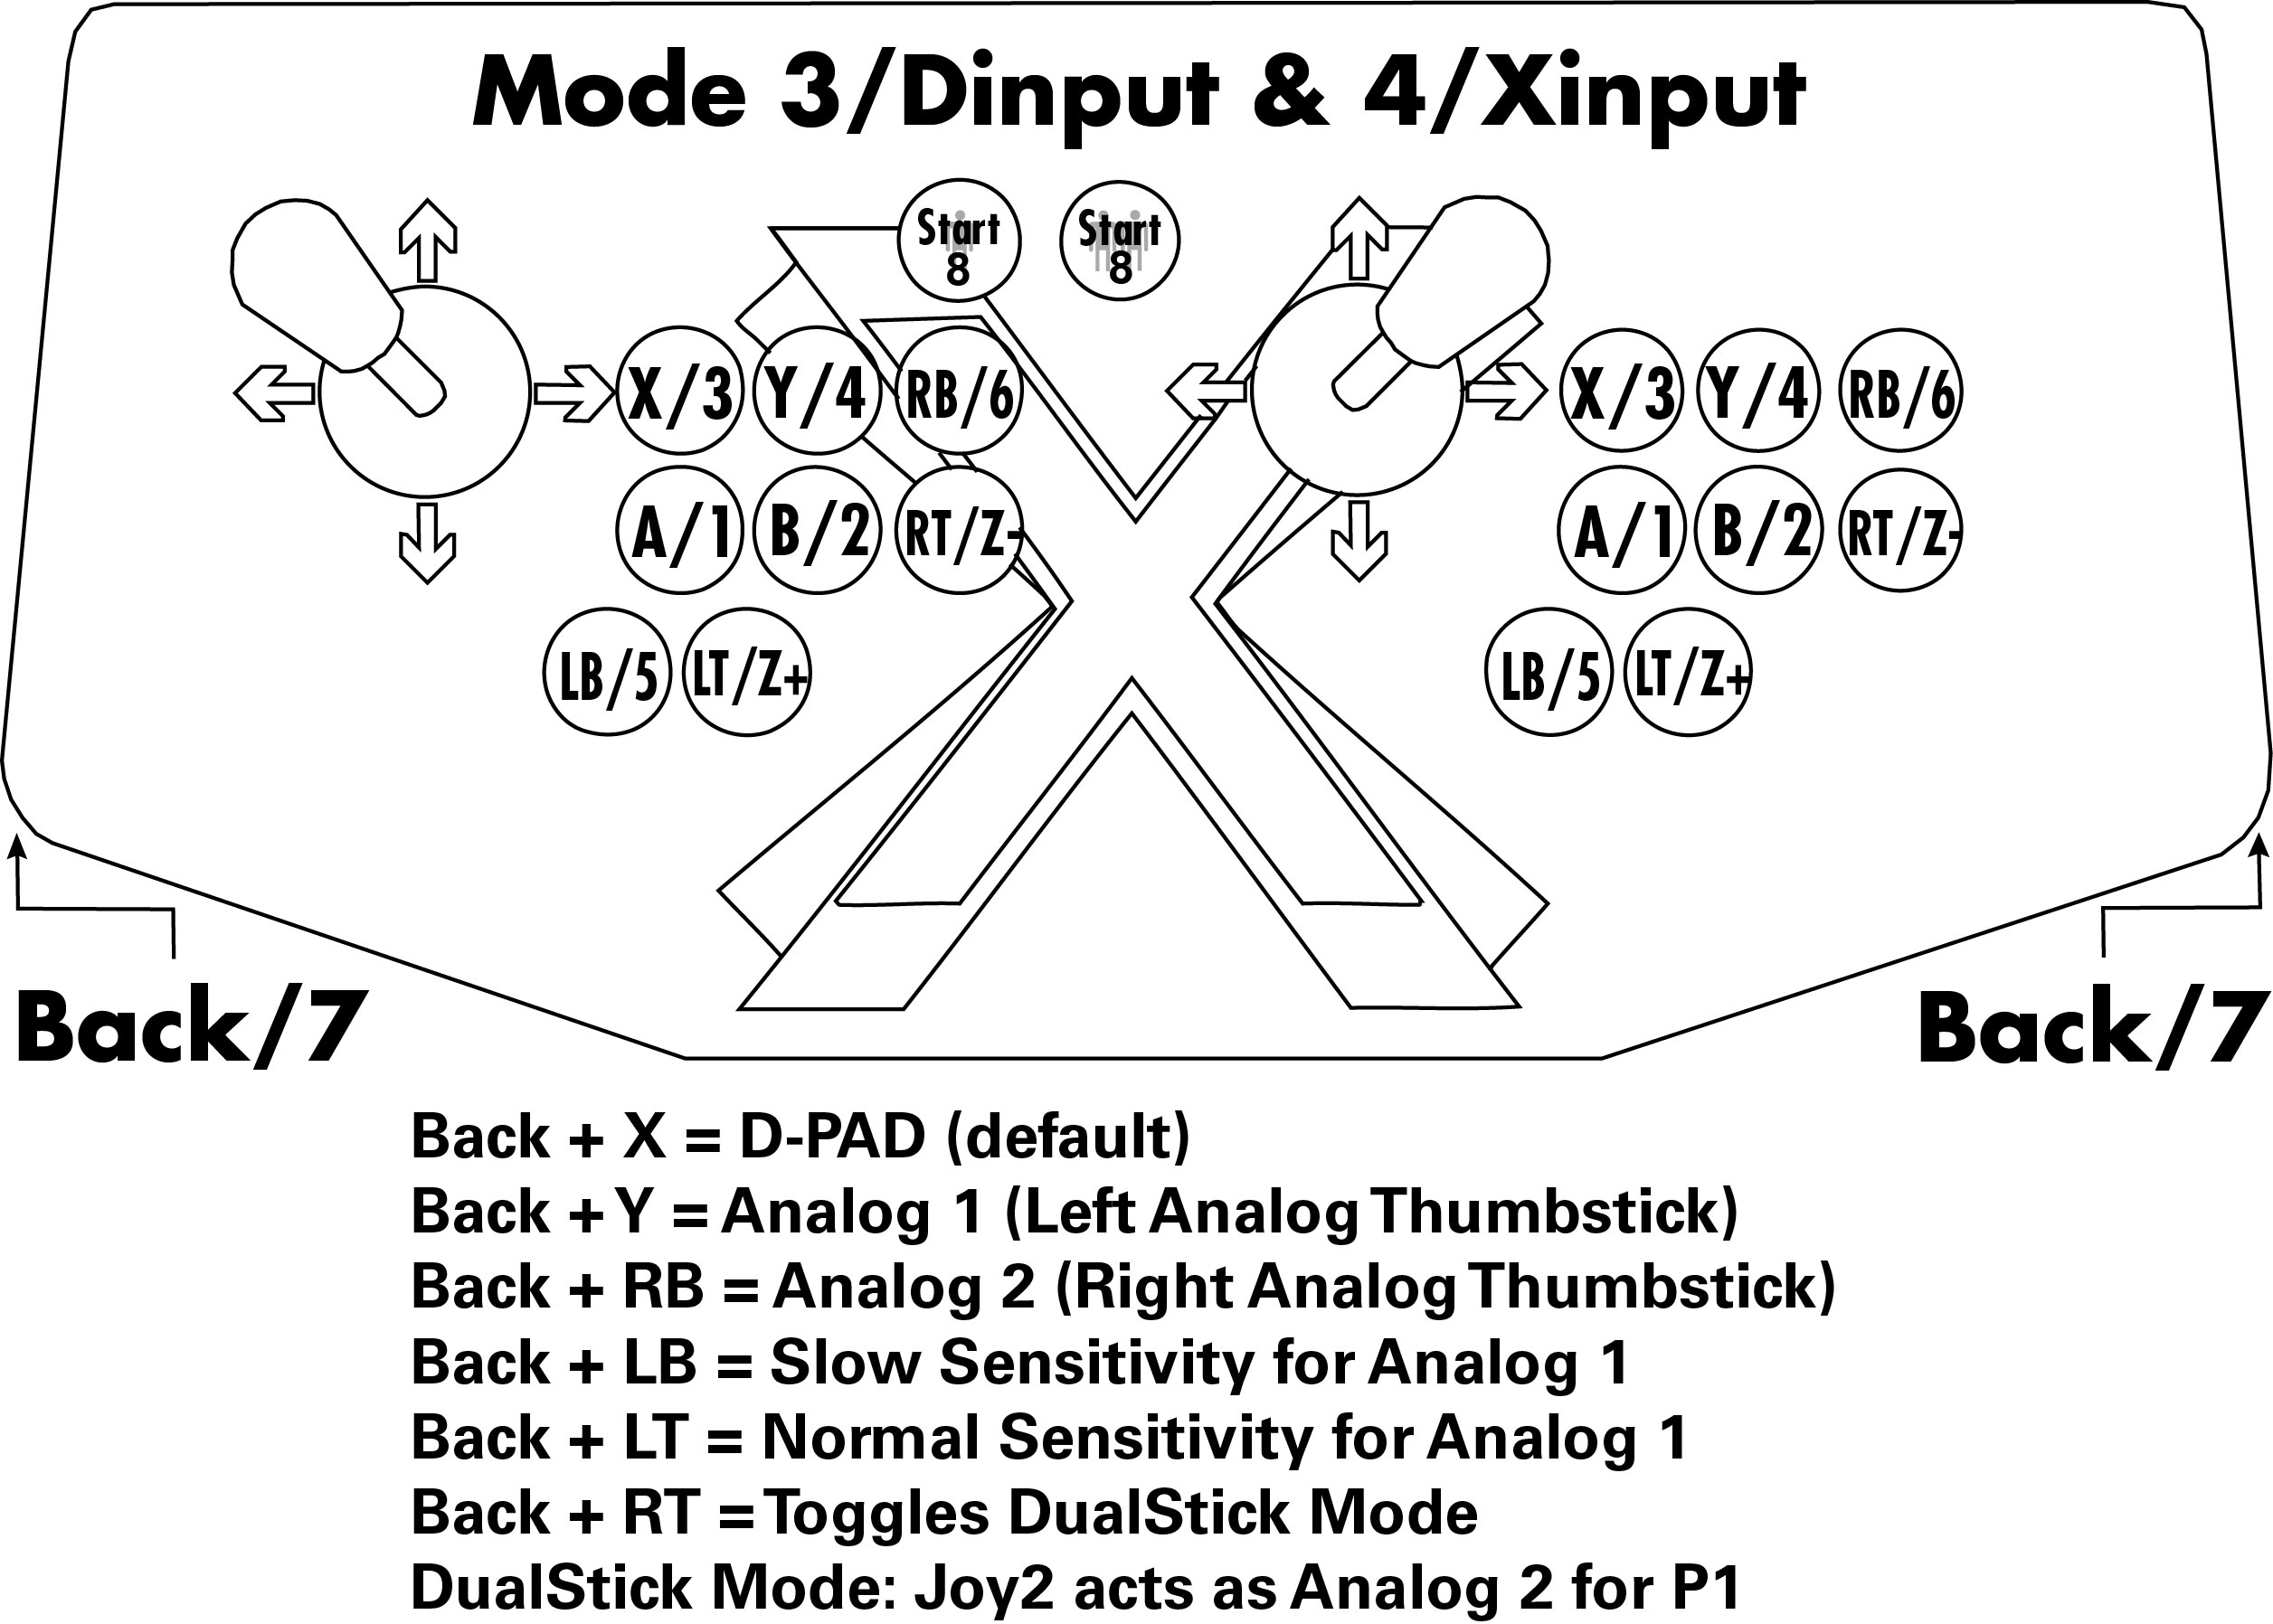
NOTE: YOU CAN RIGHT CLICK SAVE AS FOR FIRMWARE LINK IF ANY ISSUES WITH SECURITY OR LINK NOT WORKING. http://www.xgameroom.com/service/ServiceFiles/Tri-mode%20PCB/Tri-Mode%20FW%20V19.4%20Update.zip
OR PASTE THIS URL
- Download the newest V19.4 firmware package here, it includes the firmware updating software and newest firmware. Note that this version changes the button layout from modes 3 and 4 as shown here.
- Extract all of the contents in the downloaded .zip file to a folder on your computer, such as your desktop. Do not run it directly from the zip file.
- In the folder, run the Xgaming Firmware Updater.exe
- With the X-Arcade unplugged from your computer, hold Start buttons 1 & 2 simultaneously while plugging it into the USB port of your computer (Note: For firmware 19.3 or above, you will now need to hold the Programming/Mode (PM) button on the back of the controller while plugging it in instead) The software should now recognize it, see troubleshooting below if it does not.
- Click the Open FW File button, and it will allow you to choose the firmware file ( .MTP found in the same folder as the updating software).
- Do not unplug the X-Arcade from the USB while the firmware is being updated! Press the Flash button, and wait until all of the bubbles change from red to green at which point you will hear the disconnect sound on your computer letting you know it completed successfully. This can take up to 30 seconds.
TROUBLESHOOTING
- Test your X-Arcade to make sure your buttons are all working especially your Start buttons which enable firmware update mode.
- For newer firmware (19.3 or above), you hold the Programming/Mode (PM) button (on the back of the controller) while plugging it in to enter firmware update mode. For older firmware, you hold Start buttons 1 & 2 simultaneously while plugging it in instead. If one way doesn't work try the other!
- Do not run the firmware update directly from the zip file. Instead extract all of the contents in the downloaded .zip file to a folder on your computer, such as your desktop.
- Make sure the X-Arcade is plugged directly into a USB port on the back of your computer, not the front or in a USB hub.
- Disable antivirus and try again if you still have trouble.
- If you open the Firmware Updater software and it says the controller is unrecognized, unplug it while that message is on the screen and run the Updater with the controller unplugged. Then when it asks for the controller plug it in again and it should find it.
- Solo Controllers: There is no start button 2 on the X-Arcade Solo, so you will need to temporarily swap J2 and J6 and hold buttons 3 and 6 while plugging it in. The new firmware will change which buttons are used for the firmware update in the future to the programming button on the back instead.
- CANNOT LOAD FIRMWARE, FLASH FIRMWARE ERROR. SEE HERE
OLDER FW VERSIONS: